f The Bugbytes: May 2013

Welcome - Copyright & Disclaimer

Welcome to The Bug Bytes a site/blog mainly for Papercrafting and some photography and other stuff thrown in here & there. Add in some die cutting machine, scrapbooking tools, cameras, scissors , glue and...... My name is Pam. If you have been redirected from Papillon Digital Design you have come to the right place.Hope you get inspired by the projects, videos and files. Would love it if you could leave comments and become a follower. (Word verification is turned ON to avoid spam. Sorry for that inconvenience.) Would love it if you would also share your project here . If you find a linky under the post do share your project by posting link there or if you do not find a linky post your link in the comments.Thank you for visiting. The website Papillon digital designs has changed to Papillon Digital Design so if the link gives and error or takes you to page with chinese characters then please drop the 's' in the link at the end of papillondigitaldesigns and try . That is change papillondigitaldesigns to papillondigitaldesign and try the link.

May 27, 2013

Specially for you

Jo's Scrap Shack has started challenges and it is every Friday.
This time they have a sketch.


So here is my card for this challenge


post signature

May 20, 2013

And the winner of the blog hop is

And the winner from Blog Hop - Happy wee birthday is
Congrats Lynden Blossom 
who said...

17
Hello, Pam - I'm here via Jo - This is a Lovely, Delicate card! I'm Following via GFC - and look forward to seeing more of your creations - ;-} Happy for the chance to win Your goodies, too - Am just beginning to use Spellbinders items - ;-}
Lynden

So Lynden send me your address and I will have the spellbinder on it's way to you. :)


post signature

Birthday card and gift box

Hello all, it's Danita from http://danitasdesigns.blogspot.com/.  My project this month is a birthday card and matching gift box that I was asked to make, as a surprise, for a dear friend. Now this being a surprise and me not having a picture of my friend, I had to become a sleuth!! I stalked her facebook page until I found single picture of her that I liked and I copped it!!! lol  I blotted out the background with an ink pad, embellished and then made a matching gift box to put it in.
Here is the finished card.
Here's the inside
For those of you that may remember, I told you, in a previous post, about how I like to use the plastic domes with my cards. For details about how to use the domes, you can check out more information on my blog: http://danitasdesigns.blogspot.com/2013/03/acetate-dome-birthday-card.html


The Box
For the box I used my old trusty tool, the enveloper. It comes with instructions on how to make a box top and bottom, but you don't have to use this to make a box.  I'll show you how.
Jsnnj15o9zqmnxitlwixzsmdvjvo4oz3

The first thing you want to do is place your card in the middle of an 8.5x11 piece of cardstock. Cut a piece of scrap piece of cardstock the length of the paper and as wide as the depth of the card.  In this case 1inch. Use this as your guide and mark each side of the paper 1inch.

52kb467q0f18dgw7a6szgnrxgtqznqk9
Then you want to cut an angle on all four corners of the paper.

Fold and crease each side, turning the angle pieces inside.
Glue all the edges together with a glue you trust to hold. I use Scotch Quick Dry Glue. Paper clip the edges together and let dry.
There you have it! the completed box bottom. Easy!! 

Repeat the same steps for the top. 

See this 5x7 card fits perfectly in this size box!
Thanks for looking!!!


May 18, 2013

Giveaway on papillondigital

The giveaway on Papillon Digital Designs ends on Monday. So do check out the details in the link


post signature

Ring - Hello!

This is image Ring -  one of Sunday'e new release at DS4J shop this week.


This time instead of copics I used twinkling H2O. Talk about shine. It does take a little getting used to as it is a little bit opaque and wow the shine.
I did use stickles to make those black dots on the pink paper lace and swirls at the top on the orange CS.

Challenges I want to enter this card into

  1. http://disdigidesignschallenge.blogspot.com/2013/05/show-us-your-bling-challenge.html
  2. http://onestopcraftchallenge.blogspot.com/2013/05/challenge-229-anything-goes.html
  3. http://ourcreativecorner6.blogspot.co.uk/2013/05/anything-goes.html
  4. http://simplycreatetoo.blogspot.com/2013/05/challenge-37-anything-goes.html
  5. http://craftingmusketeers.blogspot.co.uk/2013/05/welcome-to-our-1st-challenge.html


post signature

May 16, 2013

Exciting news at DS4J


There is an exciting news at DS4J shop
Digistamps4Joy now has a REWARD POINTS SYSTEM in place!! 
This means you can earn 'points' on every purchase you make, which will add up to a discount on your next purchase!

Do go to the DS4J shop shop and check out  the details 


post signature

My Fair Lady - Twisted Circular Easel Card


Hi Everyone

Michelle here from Lady Of Leisure Ink, thank you as always Pam for allowing me to play at 'your house'.  As it's Thursday, it is also time for another Dare To Be Sassy Thursday challenge over at Sassy Studios -this week the challenge is to use black and white with a pop of colour.  I loved making this card because this is a fabulous image and is from one of my all time favourite films.


I decided to make this a twisted circular easel card, and used my Cameo to cut out all the card base and background circles.  There is a great tutorial for Twisted Circular Easel Cards here.  As always I used my ProMarkers for the colouring, or more aptly in this case 'shading'.


Of course I had to pay further tribute to the movie with the sentiment, and add a little bling for my 'pop' colour.


Finished it off with a matching envelope.


Please come and join in over at Sassy Studios, the design team have made some wonderful creations to inspire you.

Until next time.

Michelle

May 14, 2013

DS4J CHALLENGE # 67 – spring has sprung

The challenge #67 this fortnight at DS4J is Spring has Sprung.
Here is the theme (in quotes)

THEME : 'Spring has sprung'. The Northern hemisphere will be celebrating spring! Make a creation/card showing how you enjoy this season, whether it is chasing the lambs in the field, oohing and aahing the new blossoms on the fruit trees, or the fact that you will be seeing more sun! Go for it! The word SPRING should appear somewhere on your card.

Isn't it fun? 
Weather this year is so finicky. Feels like winter some days and summer on others.
But it is flowering. Smell of jasmine and roses - Hmmm - Divine!
I have used a pretty image this week called Berry Pixie


Sure was a bit hard to do as I used a thick K&company paper to make the ruffles instead of a thinner pattern paper .Lots of learning curve. Because of all thickness unless you make the card top edges as box like to cover the sides it shows too much.  Inspired by Anna Griffin and Christina from Card making magic. Only one change I wish I had made, I wish I had colored the pixies top hat more flower like color instead of leaf like. Guess I thought green would pop up more than the orange when I was doing it.Added lots of stickles for sparkle
P.B. Shelley is one of my favorite poets along with Frost , Wordsworth and Tagore.
Anyone remember Ozymandias? inspired by  Ramses statue? One of my earliest reads was seeing it in Times  library books - Ancient Egypt.

Ozymandias
I met a traveller from an antique land
Who said: “Two vast and trunkless legs of stone
Stand in the desert. Near them on the sand,
Half sunk, a shattered visage lies, whose frown
And wrinkled lip and sneer of cold command
Tell that its sculptor well those passions read
Which yet survive, stamped on these lifeless things,
The hand that mocked them and the heart that fed.
And on the pedestal these words appear:
`My name is Ozymandias, King of Kings:
Look on my works, ye mighty, and despair!’
Nothing beside remains. Round the decay
Of that colossal wreck, boundless and bare,
The lone and level sands stretch far away”.
-Percy Blythe Shelly


Oh I so digress from the card.
But this poem always gets me - so humbling isn't it? The Hand of Time.
Now I want to enter this card in some challenges
  1. http://myshericrafts.blogspot.com/2013/05/my-sheri-crafts-challenge-110-flower_11.html
  2. http://pinkgemchallengeblog.blogspot.com/2013/05/challenge-79.html
  3. http://craftycalendarchallenge.blogspot.com/2013/05/crafty-calendar-may-challenge-blooms.html
  4. http://kraftyhandschallenge.blogspot.co.uk/2013/05/may-challenge-flower-frenzy.html
  5. http://www.pumpkinspiceblog.blogspot.com/2013/05/winner-announcements-challenge-19.html
  6. http://outlawzchallenges.ning.com/group/copicchallenge/forum/topics/copic-promarker-challenge-may-10th-16th
  7. http://dianamlarson.blogspot.com/2013/05/dlart-thankful-thursday-challenge-109.html


post signature

May 13, 2013

Baby Boy Mini


Hi - Lori here from ScrappinMyStressAway!!  I hope all the mom's and grandma's had a wonderful Mother's Day yesterday!!

A friend recently had a baby boy and I made this mini for her.

I started out with a chipboard album from Michaels that was burlap on one side of each page.  I flipped every other page over to have a burlap cover and back, as well as the middle two pages both burlap.

I cut out the boy pieces from my Cricut Imagine Nursery Tails cart at 2-3 inches each.

I painted the edges of the book pages with a bright blue and inked the images with the same color blue ink pad.


I covered these pages with a green leaf paper from my stash.  I cut out a star from George and trimmed off the pieces that hung a little over.  I included a photo mat on the next page for a crib photo right next to the key information (height, weight, length and date).  I included a little twine.


I used a brown patterned paper for photo mats and pop dotted these baby boy images to the edges.


I like to make a pocket in all of my mini albums and add tags and small pieces of matching papers for additional photos and notes.  I used my ATG gun to adhere the sides and bottom of the pocket to the page.

I added another photo mat and image to the last page.


I put some brown paper on the back of the album and tied ribbons to the rings.


This mini album can be used as a brag book for mom or grandma!!

Thanks Pam for having me on your my blog today!!  You can see more of my work on my blog HERE.


May 12, 2013

Happy Mother's day and sharing The Lady

Happy mother's day .
I wanted to share a post I made way back http://www.thebugbytes.com/2011/04/lady.html
This for my mom.
Happy mother's day mom


post signature

2 Male Birthday Cards

Hi Crafty Friends :)
Today I am sharing my project's with you here and on my own blog Adele's Creations.com

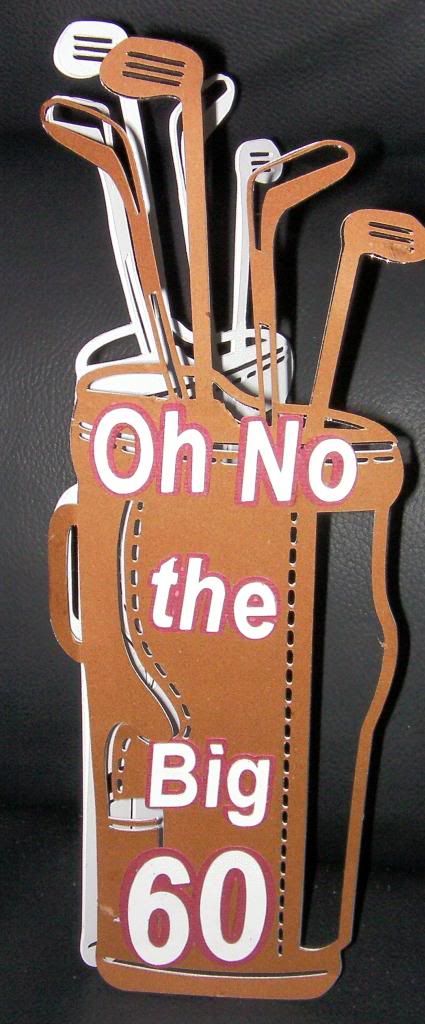
I have two Male Birthday Cards for you today, both my Eldest Brother and my Brother-In-Law share the same Birth Date the 13th May, so I made my Brother's first, he will be 60 and is a golf fanatic

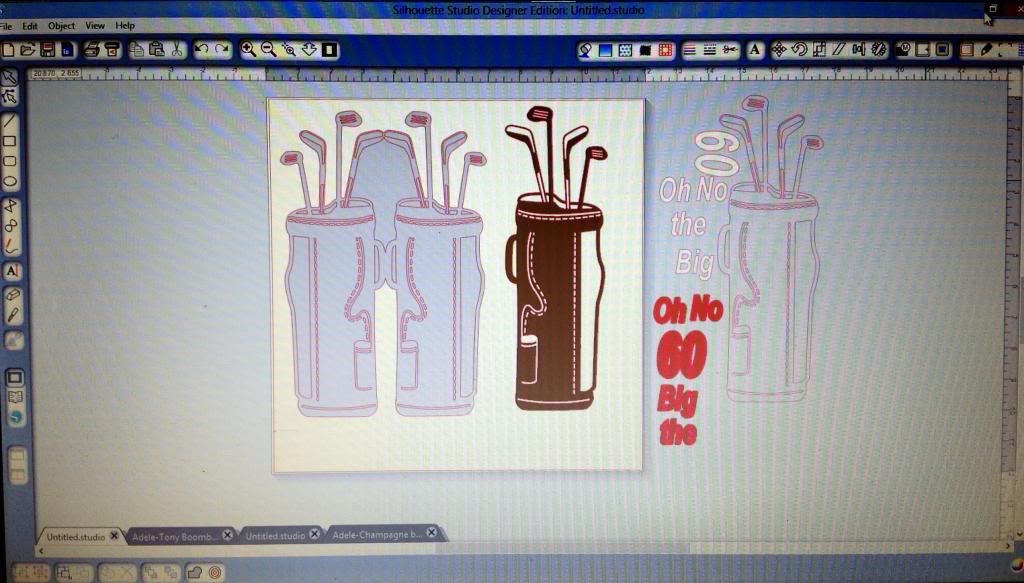
I used a silhouette Studio file from the online store for this card


Here is what the screen shot looks like when I added text


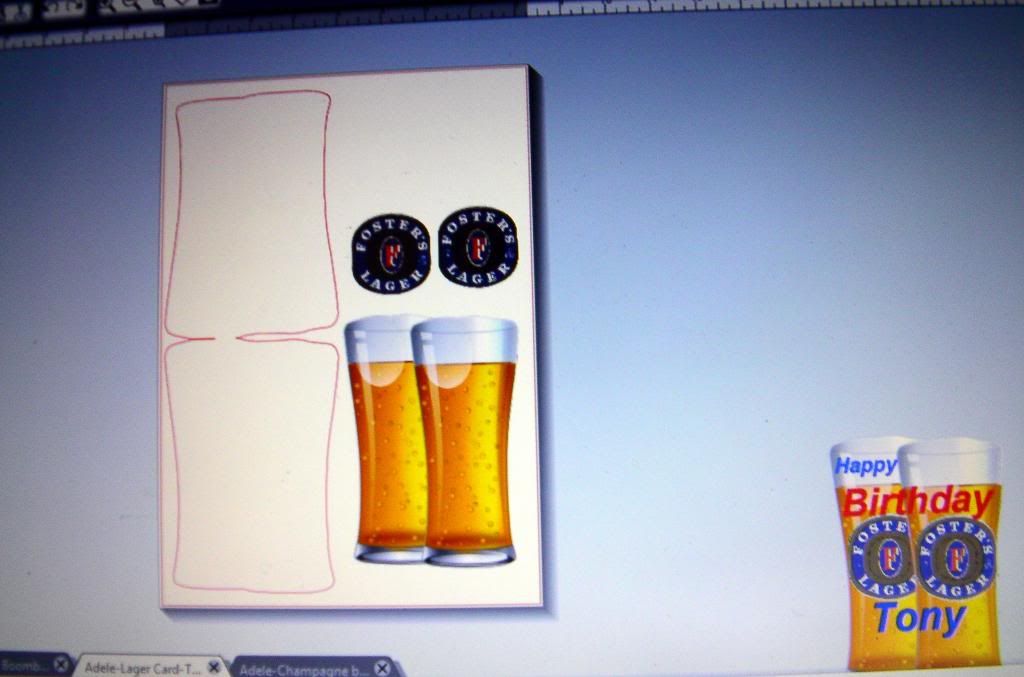
For the next card, I Google searched for a pint of Lager and a Foster's label, here is the screen shot


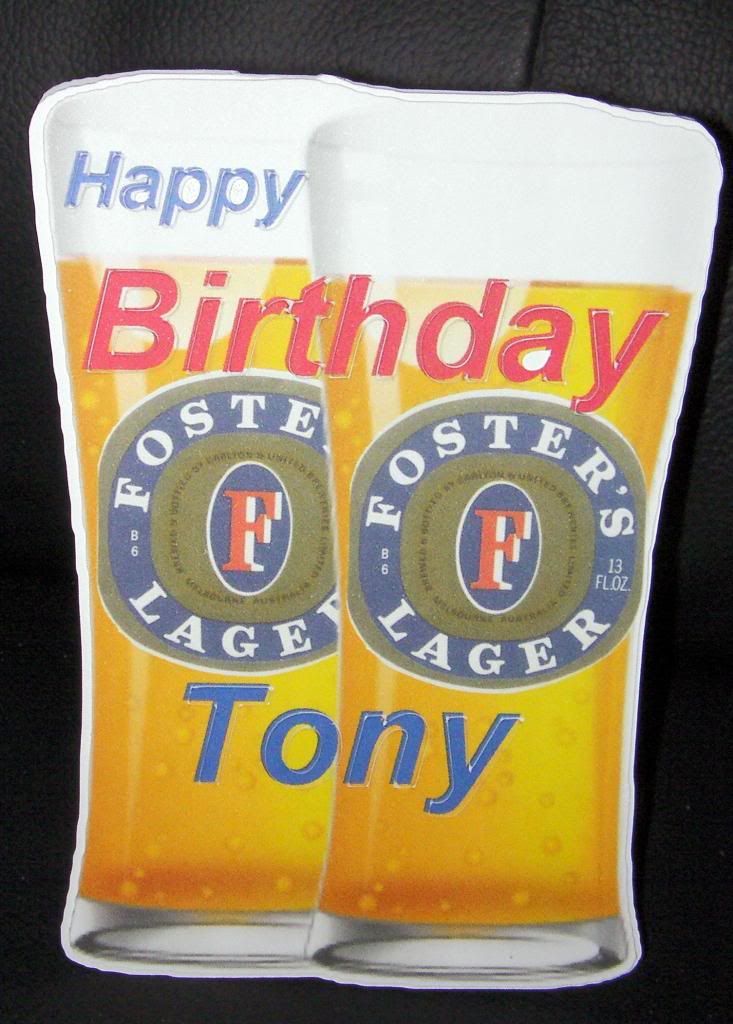
And here is the card when assembled


Inside I added the sentiment "Have a drink on us" with a Teabag attached LOL!!!

If you would like the free Studio file for the Lager card you can get it HERE

Well that's it for another month, thanks for stopping by and thanks Pam for having me again :)

Happy Crafting

Hugs

Adele

May 11, 2013