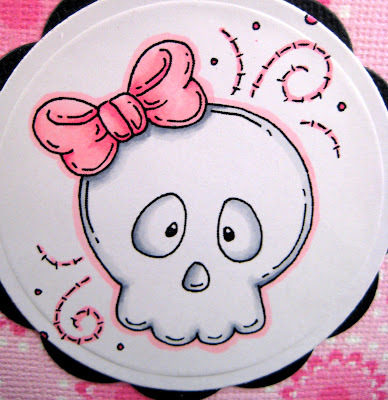
Hi ya everyone! This is Melissa from Melissa Made! Thanks so much Pam for letting me share this project. My daughter goes back to school soon and I wanted to sneak a special treat in her lunch box. I made this container using her favorite colors! She's also really loving the goth stuff - so I chose this little Cutie Skull from Meljen's Designs to put on the side.
Once I had the scoring finished, I simply adhered all sides of the carton. I started with the small flap and placed a small strip of adhesive down the side.
I formed the base of the box by adhering that flap to the inside of the other flap.
I then folded in the bottom and placed adhesive there as well starting with two opposing flaps and then the other two.
Once this was done the rest was easy. The score lines worked perfectly for forming the top portion of the milk carton.
Next, I printed my Meljen's Designs Cutie Skull out and used the Cuttle Bug to cut and emboss. For the first cut I used a circle nestable from Spellbinders and taped it to the paper so it wouldn't shift going through the Bug. I also used the A plate, B plate and the C plate.
I then wanted to emboss the edge of the circle so I ran it through the Cuttle Bug again using an A plate, an embossing mat, three thick pieces of cardstock and two B plates.
This gave me a fabulous embossed edge.
I colored the skull using the following Copics.
Thanks for stopping by today! Please feel free to ask questions and visit my blog for more fun projects!
I formed the base of the box by adhering that flap to the inside of the other flap.
I then folded in the bottom and placed adhesive there as well starting with two opposing flaps and then the other two.
Once this was done the rest was easy. The score lines worked perfectly for forming the top portion of the milk carton.
Next, I printed my Meljen's Designs Cutie Skull out and used the Cuttle Bug to cut and emboss. For the first cut I used a circle nestable from Spellbinders and taped it to the paper so it wouldn't shift going through the Bug. I also used the A plate, B plate and the C plate.
I then wanted to emboss the edge of the circle so I ran it through the Cuttle Bug again using an A plate, an embossing mat, three thick pieces of cardstock and two B plates.
This gave me a fabulous embossed edge.
I colored the skull using the following Copics.
I punched wholes in the top and ran some Tulle through and a black and white gingham ribbon. I LOVE using tulle on my projects and saw this first in this post from Kristy at She's A Sassy Lady!
Thanks for stopping by today! Please feel free to ask questions and visit my blog for more fun projects!


5 comments :
Wow! What a great project! Love it. TFS
Melissa, you gotta know I LOVE this! Hey, I love boxes and this one is just adorable!
Hi, Pam. Hope you're doing well! I have a blog award waiting for you to pick up whenever you can on my blog!
Hugs!
What a great little project Melissa. I wish I had had a mother like you when I was a little girl! Love it!
Sooo cute!
"kind encouraging and inspiring words"
I appreciate your comments so much. They are treasured and such an inspiration. Thanks for leaving them.