Today I am a guest designer at She's a Sassy lady blog.
Yes. First let's get the exciting part out of the way ;). So the card ..
Ha Ha got you.. Nope :) it is the giveaway that is exciting isn't it?

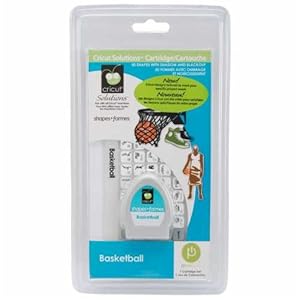
So I will be giving out a basketball solutions cartridge on She's a Sassy Lady blog to a winner who will be randomly picked on July 10th morning. Be a follower of She's a Sassy Lady blog and leave a comment with your email in the following link/post - http://shesasassylady.blogspot.com/2010/07/doe-deer-card.html (you are welcome and I would love comments in this post :) ,but only the comments left on the post of the link I have given will be entered for the draw)
I did say I was now watching her blog to see if she hits 500 didn't I?
Be kind and please do follow my blog also lol ;)
Ok now that we have that out of the way.
Here is the card which I named Doe a Deer with a matching envelope.
The cartridge used is Cindy Loo and just one shape from gypsy wanderings (a small rectangle to weld). For the envelope I have also used Martha Stewart punch - Arch lattice which I picked up from Walmart at a clearance price when they cleared up the shelves for the lite cartridges.
Here are the two part videos
Part 1
Part 2.
Now for the how to's
Let's take a look at the gypsy file
Page 1
I have welded two shapes and used the hide and contour to hide the insides . But even though the shape looks symmetrical instead of just copy pasting (after hiding the contours) I have also flipped the 2nd image for in cricut we never get a perfect symmetry and for perfect alignment it is better we do this. I also welded a small rectangle to the shape .
Apart from flipping make sure the two circles are aligned by using the y axis to check
Page 2
The envelope is also from the same cartridge with the label next to it hidden. usually we choose the envelope first and size the card. But here since I could not have the card lesser than a particular width so that the cuts are ok and larger than 2 inches I had to strike a balance and I allowed the top of the envelope to cut off. I did not like the shape too so to get the extra 2 inches I cut the same paper I used for the card base and then used the martha stewart arch punch on it. It co-ordinates beautifully instead of a plain envelope.
the layers - pages for the deer
Ok now for the papers. I used these papers . The last one is rice paper
Here are the cuts
Note the paper on the right. It is rice paper painted brown and the strips are the paper torn to get some texture.Here is some green painted paper
I pasted the lace paper with the deer directly on the card base and colored just the trunk of the tree brown and then used the brown and green torn paper (which I painted with watercolor) strips to add some nice texture.
here's how it looks up close (and very personal :) - ohh!! Robert Redford - even though the effect does not look that good ;) it is not bad either. Kind of pretty I must say )
I also added some stickles. Then I painted the deer with q tip and dew drop inks - first applied the platinum and then the cosmic copper. This gives a soft blend for the spots. you can also use copic marker and paint completely and then use the colorless blender which will erase back or push back the color to give you spots. I added more stickles and some bling to the whole card
Here are the stickles, punch, inks I used
Some ribbons and flowers and bling completes the card
So except for the painting , tearing and gluing the rice paper a pretty easy card to put together. Hope you enjoyed this project. Thank you sassy for having me on in your blog and thank you readers for staying with me a while and looking at this project. I have posted the gypsy file in the usual place (gypsy files in the navigation bar)
Don't forget to leave a comment in the link above for a chance at winning the cartridge. Have a blastful July 4th..


Pam this card is GORGEOUS!!! I love the intricate detail and all the BLING. I learned more about water colors today too! This looks so beautiful with the matching envelope... I just love it! Aren't you a sweetie offering a giveaway on my blog... Thanks friend!
ReplyDeleteWOW!! You are amazing!! Thanks for sharing this lovely card with all of us!!
ReplyDeleteBev B
Wow, Pam this is really a beautiful card.. you make it look so easy to do, which I am sure it isn't.
ReplyDeleteThat is such a beautiful card Pam!!
ReplyDeleteYou have now overwhelmed me. I will have to take some time understanding this gyspy work . Thanks
ReplyDeleteLove the card
ReplyDeletelove all the detailing z]and the papers are gorgeous too.
ReplyDeletePam -- this is one of the sweetest cards ever; and I, too love this cart. The doe is absolutely awesome and your artistry really shows! Can't wait for the gypsy file!
ReplyDeleteMany thanks for sharing!
Gorgeous card. So detailed. Beautiful. Love the use of the stickles and inks.
ReplyDeleteExcellent work. Thanks for the inspiration.
absolutely love the card. tx for sharing
ReplyDeleteABSOLUTELY GORGEOUS!!!! Your detail is amazing!!! Thanks for sharing!!!!
ReplyDelete