
This box is on page 120 in your handbook and is a personal favorite. I was so glad that this was the one that Pam and Magoo asked me to do!
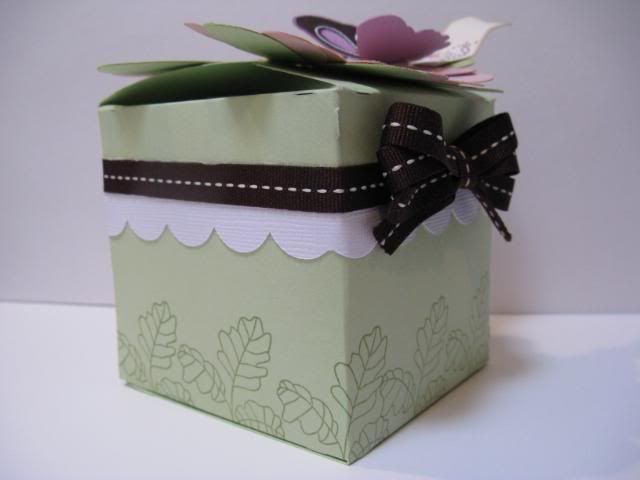
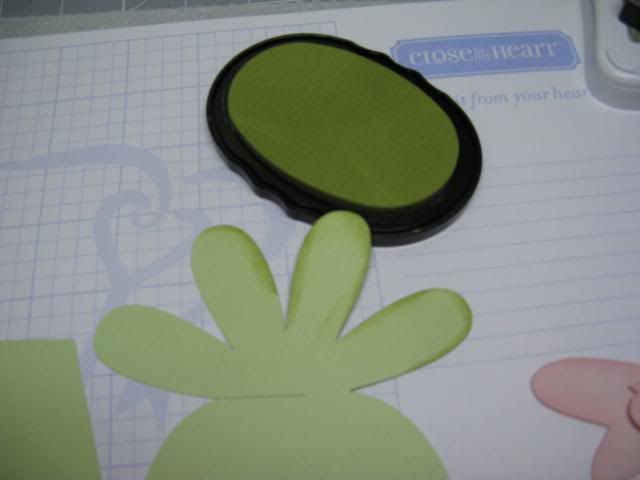
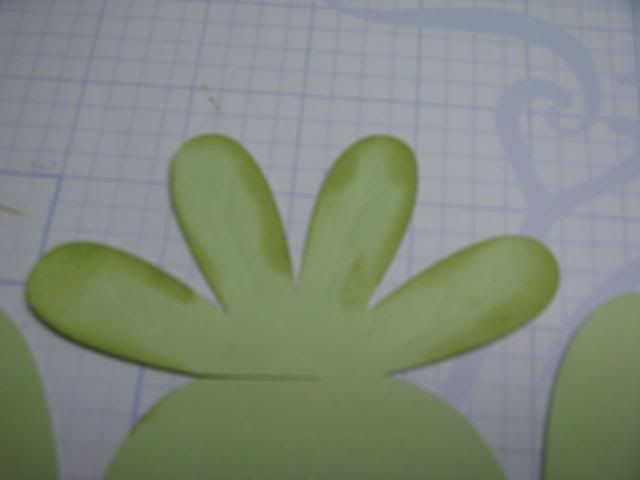

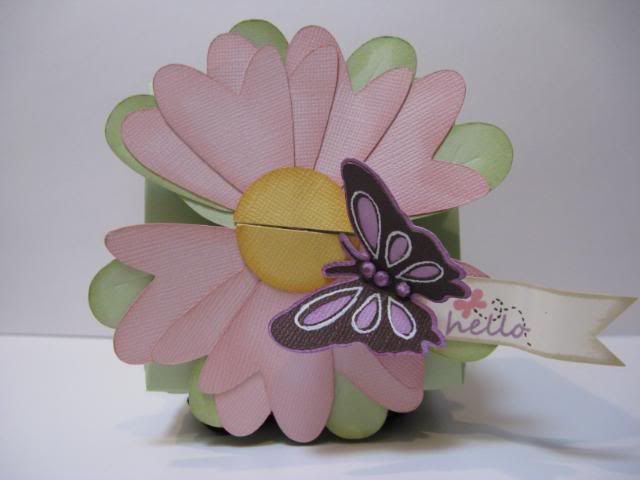
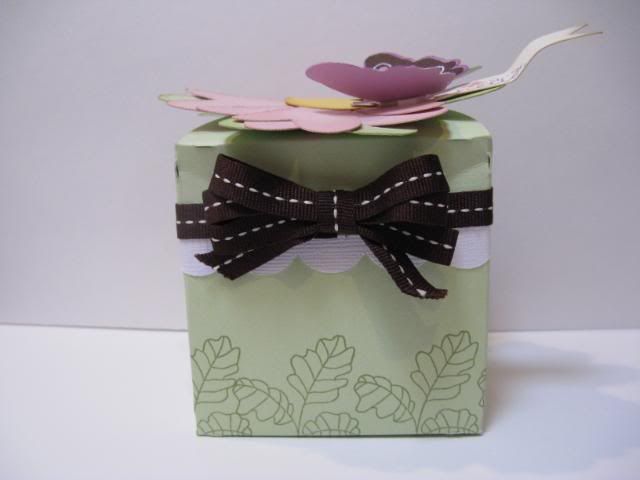

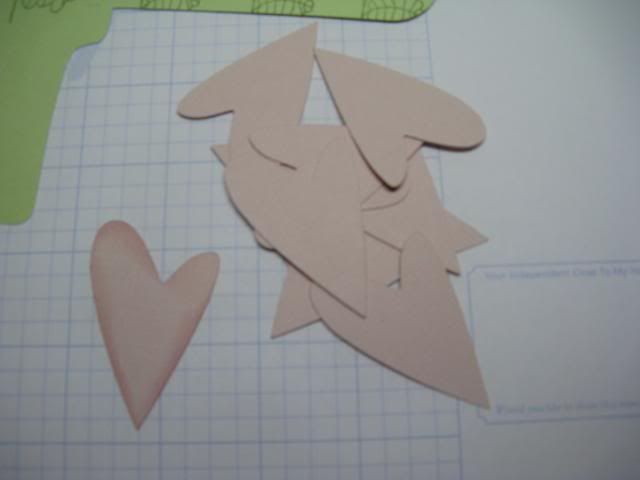
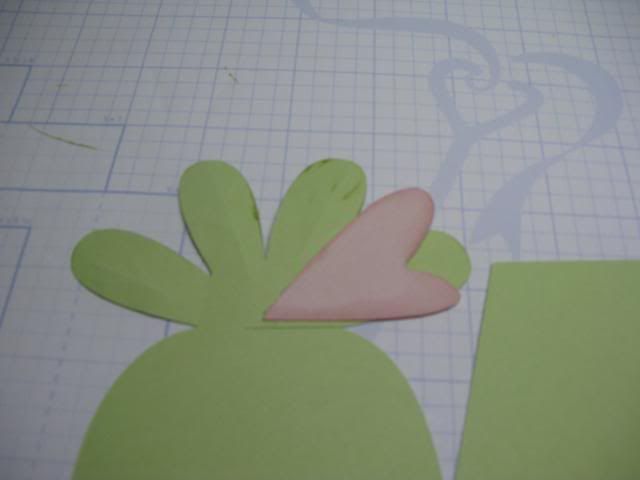
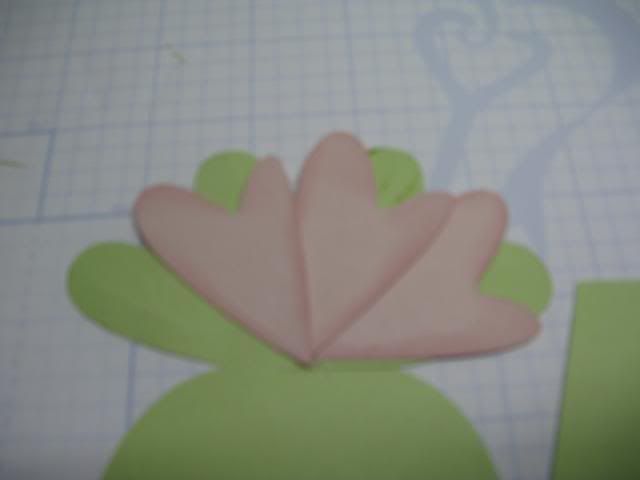
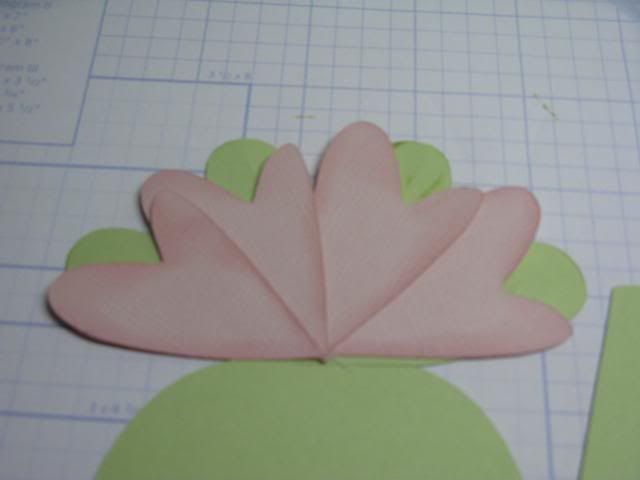
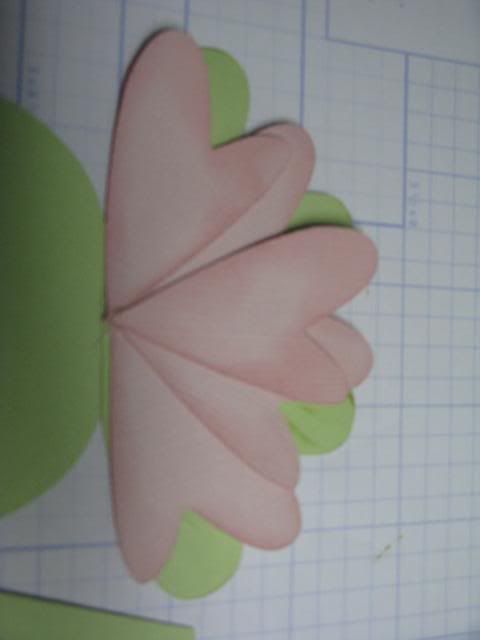
The flower petals are hearts from Don Juan.
I made ==>this<== cut file using my gypsy and cut out the box(using green cardstock and a 12 x 24" mat), the hearts(using pink cardstock), and the scallop(using white cardstock). 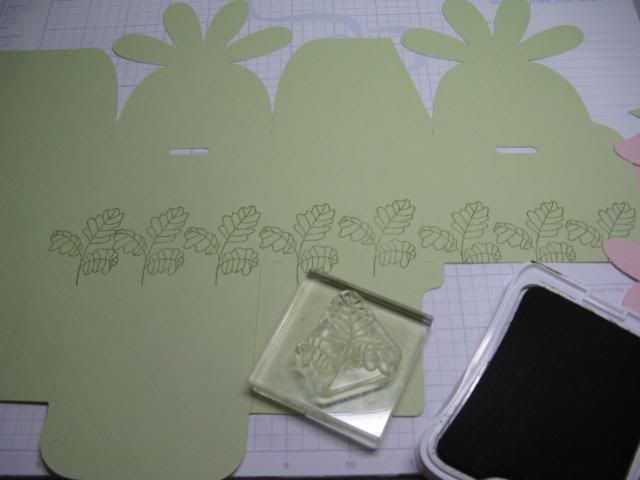


I adhered the scalloped border. Then I scored the box using my scorpal. Using the cut tick marks as my guide.
Then I cut out a circle for my flower center with a circle punch and inked the edges. Then cut the flower center in half and adhered it to my project.
Then I cut out a circle for my flower center with a circle punch and inked the edges. Then cut the flower center in half and adhered it to my project.

Then added my butterfly that I cut with the *New* Cake Basics cartridge at 1 1/2" with a small sentiment banner.
VOILA! Now you have a pretty little box that is perfect for any Mother's Day, birthday, or just because gift.
Thank you so much for stopping by today and checking out my creation. Please feel free to stop by one of my other blogs. As a matter of fact on my own blog this week I am giving away several prizes. I am also making cards all week with the newly released cartridges. Click ==>here<== to check it out.
Have a wonderful day!
Beautiful! I'm not sure that cricut users understand the value of TBBM. Thanks for showing me a beautiful take on a box! A;so, just another cartridge that I need with Cake Basics. Sigh . . .
ReplyDeleteAnother site to follow and be enticed with. :))) (big smiles) I have TBBM and have not paid enough attention to it. I can't wait to see the other projects made using this cartridge!
ReplyDeletethanks parkernana5@cox.net
So cute! Thank you for the step by step instructions!
ReplyDeleteMelissaAllore on the Cricut Board
Melanie thank you so much for sharing this beautiful box with us. I love the way you decorated it! It just shows me I need to stamp more often! Thanks for sharing your talent with us.
ReplyDeleteVery nice gift box Melanie. The colors are awesome. Thank you for sharing.
ReplyDeleteTrish
that is sooooooo cute i love it thank uhttp://us.i1.yimg.com/us.yimg.com/i/mesg/emoticons7/4.gif
ReplyDeleteSo cute. Love the flowers and butterfly.
ReplyDeleteAdorable little box! Love the idea! Thanks so muche for sharing, Melanie!
ReplyDeleteOOOOOh Soooo Cute! Filing that one away for future use!
ReplyDeleteI've made this box before, but love the idea of the "heart" flowers. Thanks for tutorial.
ReplyDeleteBecause you give such step by step directions you take the intimidation factor out of trying something so complicated.. it is beautiful! I would not have thought of the hearts.. cleaver gal you are. :)
ReplyDeleteThe box is very cute. Love it.
ReplyDeleteErin
ekell77@hotmail.com
Thank you for sharing this beautiful box. I love how you added the hearts to embellish the top - i have made this box several times but never knew or thought how to make it even prettier. I will definately have to try this. TFS!!!!!!
ReplyDeleteThis turned out so cute! Thanks for all the directions.
ReplyDeleteThanks for the wonderful sample to show us, it's beautiful....love the flower.
ReplyDeleteConnie Gage
Love this cute little box and the way you made the flowers.
ReplyDeleteKim xXx
What a sweet little box...so pretty!!
ReplyDeleteThis is so pretty! Love it
ReplyDeleteThe box is absolutely adorable! Great job and thanks for sharing :)
ReplyDeleteYour box is sooooooooo lovely. Thank you for sharing it with us and your awesome talent!!
ReplyDeleteCute, cute, cute! That butterfly is SO pretty..the stamping is such a great idea...and I love your sentiment banner. TFS!
ReplyDeleteCute box. I love the card also.
ReplyDeleteThis is absolutely gorgeous!! I LOVE the butterfly and the additional flower pieces! I also LOVE how you stamped along the edge! LOVE THIS!!
ReplyDeleteThis is so gorgeous! I love your idea. I can't wait to try it.
ReplyDeleteWow.. this box is gorgeous! so many fabulous ideas! Thanks for sharing them with us!
ReplyDeleteBarb :)
Oh boy, I need to be fast now cos TBBM is retiring :(:( I just absolutely love your box, and the idea with the hearts as a flower is so great!! That butterfly from cake basics is so beautiful! Thank you so much for the idea :)
ReplyDeletevery sweet :) I think it would match my cardstock of my thank you note :) love it! TFS!
ReplyDeletehttp://sweetsassydiva-gspot.blogspot.com
What a sweet little box. I LOVE all things butterfly, so this is really special! Thanks for showing it to us!
ReplyDeleteCheri
Great Project Melanie! Thank you so much for sharing!
ReplyDeleteLove this Box!!! All the extras are just so pretty!
ReplyDeleteThank you so much for this post. I want to let you know that I posted a link to your blog in Creative Busy Hands Cricut Freebies Search List, under the Box, Purses, etc. post on Mar. 23, 2010. Thanks again.
ReplyDeleteThat is awesome! I really nice to see all the ideas for this cartridge. I'm going to pull that one out and start playing with it.
ReplyDeleteGreat Tutorial with your step by step instructions! Very easy to follow! I love this little bos!! Wow~!
ReplyDeleteHugs,
Lisa
muffy74sf@aol.com
This box shape from TBBM is my favorite (It was what sold me on getting this cart for sure) but I had never thought touse the petals on the box as leaves for another flower. Thanks for a great idea.
ReplyDeleteGreat box. Love it. I have this cartridge but haven't used it a lot. It is nice to see ways to dress up the cartridge cuts.
ReplyDeleteWow, this is beautiful!! Where on earth did you get the cake cartridge, or did you get it with the machine? If so, where is it on sale I haven't been able to find it anywhere until mid May?
ReplyDeleteThanks,
Annette
asimpson2 at telus dot net
Love your take on this box cut!! Awesome!!!! :)
ReplyDeleteBeautiful box Melanie!!! Love how you made the flower out of hearts, how creative. Thanks for the great detailed instructions. TFS
ReplyDeleteI have this cart & I just love it. But never thought to make the top different,& that butterfly is a cutie. Thanks for all your tips instructions.
ReplyDeleteRosebud222222222
How stinkin creative! I LOVE this box and flower!
ReplyDeleteluv it....tfs
ReplyDeleteLove the box...it's sooooo adorable! I'm thinking I need the cartridge before it's gone!! Thanks for sharing.
ReplyDeleteI love how you made that flower!!!!!!!!!!!!
ReplyDeletesooooo cute!!!! Like the box alot!!!!!
ReplyDeleteI loved this box as is on the cartridge, but I am over the top for the one you designed. I never thought to change the top the way you did! I just love it!
ReplyDeletewhat a great box, I will definately try this one thanks Dee at ed0946@ptd.net
ReplyDelete